Physical Address
Timertau, Pr. Respubliki 19, kv 10
Physical Address
Timertau, Pr. Respubliki 19, kv 10


Creating a reliable entertainment system at home starts with a solid configuration of your compact computer setup. Whether you’re streaming the latest series or enjoying classic films, achieving optimal performance is crucial. This article serves as a basic guide to ensure your system runs smoothly, particularly for those leaning towards a cost-effective, refurbished option.
One of the most essential components in this process is the software you’ll use to relax and enjoy your media. It’s vital to choose the right applications that enhance your viewing experience while maintaining system integrity. Additionally, platforms like Softwarekeep provide valuable resources for securing the necessary licenses you need to keep everything running without a hitch.
Throughout this piece, we will explore various steps to configure your PC effectively. From suggesting the best practices for installation to ensuring that your software is always up to date, this guide aims to arm you with all the knowledge needed for a seamless media experience.
The activation process hinges on several core components:
Alternatives to consider for acquiring software licenses include:
Before proceeding with installation, make sure to:
Before you begin, ensure you have a USB flash drive with a minimum capacity of 8GB. Any data on this drive will be erased, so back it up if necessary.
Follow these steps:
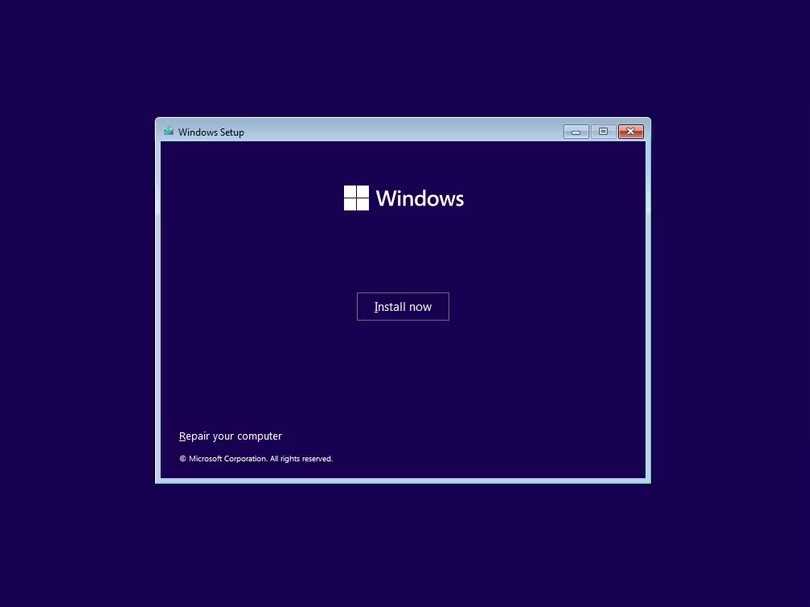
1. Download the ISO File: First, acquire the ISO file of the new operating system. You can download it directly from an authoritative source to ensure you have a legitimate version. For the United States, refer to the official Microsoft website for the most current version available.
2. Get a USB Drive: Plug the USB flash drive into your computer’s USB port. Make sure it is detected by your system.
3. Use a USB Creation Tool: Download a reliable USB creation tool, such as Rufus or the Media Creation Tool provided by official sources. These tools simplify the process of making a bootable USB drive.
4. Configure the Tool: Open the USB creation tool. Select your USB drive from the dropdown menu, then browse and select the downloaded ISO file. Set the partition scheme to GPT if your computer uses UEFI or MBR for legacy BIOS systems.
5. Start the Process: Click on the ‘Start’ or ‘Create’ button in the tool. This will initiate the creation process, which may take several minutes depending on your system and the USB drive’s speed.
6. Wait for Completion: Once the process is finished, safely eject the USB drive from your computer. It is now ready to be used for installation.
This bootable USB can now be used to install the system on the target machine. It is particularly useful for situations where software installation needs to be done without a pre-existing operating system. Always refer to the USB drive’s creation tool documentation for additional details and features.
Additionally, if you’re considering tips for smooth and valid installation procedures, visit resources like Softwarekeep for insights into updates and support.
One noteworthy trend is the rise of digital licensing. This method ties product keys to your device’s hardware, making it difficult to transfer but often more affordable. After an initial purchase, the key remains valid even after hardware changes, as long as the motherboard remains intact. Such a strategy can save users a significant amount over time.
Some platforms have emerged as popular choices for purchasing discounted keys. For instance, sites like scdkey.com offer Windows 10 Pro for approximately $20, appealing to those setting up their systems on a budget. Similarly, keyverified.com provides reliable activation support, ensuring a smooth process when applying your new key.
For a neutral assessment of current market prices, the Microsoft Store lists Windows 11 Pro at $199. Regularly checking for sales or educational discounts can yield additional savings. Educational institutions often provide students with access to discounted or free keys, allowing you to secure a legitimate copy without incurring excessive costs.
When looking for keys, ensure you purchase from trustworthy sources. User reviews and research can help identify which platforms have a history of delivering authentic product keys. Consider searching forums dedicated to technology discussions, where users often share their experiences with various vendors.
In summary, obtaining an authentic product key for your system can be achieved through various budget-friendly methods. By utilizing digital licensing models, exploring reputable online marketplaces, and leveraging educational discounts, you can set up your personal computer efficiently and effectively.

When setting up your new configuration, activation challenges can surface, particularly with pre-owned devices. Common problems arise from mismatched keys, outdated software, or hardware changes. Understanding these obstacles can facilitate a smoother setup process.
One prevalent issue involves invalid product keys. If your system prompts an error message stating the key is not recognized, verify that the entered key exactly matches the format required. Often, featuring a mix of letters and numbers, even a small typographical error can lead to activation failure. Ensure the key is sourced from reputable sites, such as where to buy original Windows key, to guarantee authenticity.
Another frequent barrier is linked to the connection to the Microsoft servers. Occasionally, the servers may be overwhelmed, yielding timeouts during the verification process. In such instances, wait a few hours before attempting to activate again, or check your network to ensure a stable connection.
Software discrepancies also play a role. Devices that have undergone hardware changes may require reactivation due to the binding of keys to specific hardware configurations. Reverting to the original hardware may solve this problem. Alternatively, using the activation troubleshooter available within the operating system can assist in resolving complications arising from hardware modifications.
Setting up an entertainment workstation requires tactful adjustments to ensure smooth operation without unnecessary noise. This basic guide will illuminate practical steps for tuning your system to meet media needs while remaining unobtrusive.
Commence with energy-saving settings. Navigate to the power options in the control panel and select a plan that emphasizes energy efficiency, such as “Power Saver” or “Balanced.” These modes not only reduce power usage but also minimize fan speeds, contributing to a quieter environment.
Next, assess the background operations. Disable non-essential applications that start with the system. This can be done through the Task Manager under the “Startup” tab. Reducing the load on the CPU and RAM not only enhances performance but also limits the activity of cooling systems.
Select optimal visual settings by adjusting the display configuration. Lowering screen resolution or turning off advanced graphics features can reduce GPU strain, leading to less thermal output and quieter operation. Aim for a balance between visual fidelity and resource demand for the best user experience.
Updating drivers is essential for smooth functionality. Use tools like SoftwareKeep to ensure that hardware drivers are up to date, as optimized drivers lead to improved performance and stability, which can minimize the need for aggressive thermal management.
Tuning audio settings can also play a significant role. If your setup includes an advanced sound card, explore its configuration options. Disable unnecessary effects and optimizations that might require additional processing power. Streaming high-quality audio in its simplest form may result in less strain on the CPU, further reducing noise.
Consider storage solutions as well. Solid State Drives (SSDs) operate silently compared to traditional Hard Disk Drives (HDDs). Upgrading to SSDs can not only enhance speed but also eliminate mechanical noise, a boon for media setups.
Lastly, evaluate cooling solutions. Custom fan curves and quiet components are optimal for sound sensitivity. Many BIOS settings allow users to set fan speeds based on temperature thresholds, helping manage noise without compromising cooling efficiency.
By following these steps, your system will serve its purpose effectively while maintaining tranquility, ideal for entertainment experiences in any environment. Efficient resource management and strategic adjustments will ensure a peaceful yet powerful media workstation.