Physical Address
Timertau, Pr. Respubliki 19, kv 10
Physical Address
Timertau, Pr. Respubliki 19, kv 10

As technology evolves, the need for user-friendly and cost-effective solutions becomes paramount. This is especially true for those operating low-noise setups, who often seek ways to enhance their experience without surpassing their financial limits. This article presents a streamlined strategy that caters specifically to this demographic, allowing users to effectively configure their systems while ensuring they remain financially savvy.
Understanding how to implement a keyverified system isn’t just for tech enthusiasts; it’s essential for anyone looking to maximize the potential of their PC without unnecessary expenditure. By optimizing your installation process, you can enjoy all the features wrapped up in the latest software without feeling the pinch in your wallet. Let’s break down the crucial steps that will keep your performance high and your costs low.
The journey to a fully functional environment involves several strategic choices. You’ll discover how to sift through various options and find the most reliable keys on the market. With a clear setup framework at your fingertips, you’ll navigate the complexities of modern software while maintaining a silent operation. Say goodbye to the traditionally cumbersome activation processes and hello to a straightforward pathway that respects both your time and budget.
When considering affordable methods to set up the latest operating system, it’s crucial to grasp the different licensing strategies available. Users can choose from various options, including retail, OEM, and subscription models, each offering distinct advantages and limitations.
Retail licenses come with the highest flexibility, allowing transfers between devices. They’re available through various outlets, sometimes at discounted prices, especially during sales or through educational programs. For those who require a single installation, this can be a viable choice.
OEM licenses are generally cheaper but are tied to the original hardware. While perfect for new builds, they limit future upgrades to new systems. Many users find OEM solutions appealing for cost management, particularly when building silent PCs.
Subscription plans present an alternative path, offering continuous updates and support for a monthly fee. Although this approach provides consistent access to the latest features, it may not suit everyone, particularly if the goal is to minimize long-term costs.
Whichever route you choose, ensure the product key meets validation requirements. Solutions like keyverified offer platforms to check the authenticity of keys before purchase, which can save you from future hassles and ensure compliance with licensing agreements. This proactive measure prevents costly implications associated with using counterfeit software.
| License Type | Cost | Transferability | Updates |
|---|---|---|---|
| Retail | Higher | Yes | Lifetime |
| OEM | Lower | No | Limited |
| Subscription | Monthly | Yes | Continuous |
Take the time to evaluate your needs based on how you plan to utilize the operating system. A balanced understanding of these options may aid in choosing the most suitable, cost-effective path that aligns with your project goals. Always validate your software with trusted sources to enhance your computing experience without complications.
Installing the latest operating system on a quiet machine doesn’t have to be complicated. This method ensures smooth setup while minimizing noise interference. Here’s an efficient step-by-step outline to get you started on your new journey with the 11th iteration of the OS.
1. Prepare Your Hardware: Before diving into the installation, verify that your components are compatible. Ensure you have a CPU that supports TPM 2.0 and UEFI firmware, which are crucial for a seamless experience with the latest features.
2. Create a Bootable USB Drive: Download the installation media directly from the official website. Use software like Rufus to set up a USB drive. Opt for GPT partition scheme and FAT32 file system to improve boot compatibility. Aim for a minimum of 8GB of storage on your USB device.
3. Configure Your BIOS Settings: Reboot your PC and access the BIOS. Look for settings labeled ‘Secure Boot’ and ‘TPM’, enabling them if they are disabled. Set the USB device as your primary boot option. This may vary by motherboard, so check your manual for specifics.
4. Install the OS: Insert the bootable USB and restart your system. Upon boot, select your language preferences and follow prompts to get to installation screens. Choose ‘Custom Install’ for fresh setups. It’s vital to format your installation partition (usually the C: drive) to avoid conflicts.
5. Complete the Initial Setup: Once installation finishes, go through initial configurations, such as region, keyboard layout, and account setup. Consider linked Microsoft accounts for added benefits like cloud integration and device sync.
6. Post-Installation Configuration: After the main setup, check for updates which can be found in Settings under ‘Windows Update’. This ensures you have all the current fixes and features. Additionally, configure your privacy settings and preferences based on your usage.
| Step | Action | Notes |
|---|---|---|
| 1 | Prepare Hardware | Check for compatibility with TPM 2.0 and UEFI. |
| 2 | Create Bootable USB | Use Rufus, FAT32 recommended. |
| 3 | Configure BIOS | Enable Secure Boot, TPM, set USB to boot first. |
| 4 | Install OS | Select ‘Custom Install’ and format C: drive. |
| 5 | Complete Setup | Follow prompts for language and account setup. |
With the operating system now installed, optimize your system settings to ensure a quiet and smooth computing experience. Keep your drivers up-to-date and explore the settings for more personalization options.
For more detailed insights, consider visiting authoritative resources like the official Microsoft website.
Achieving a whisper-quiet experience on your newly set up machine can greatly enhance your enjoyment of software interactions. Here’s how to fine-tune your settings for minimal noise after you’ve secured your keyverified setup.
By implementing these adjustments, you will notice a significant drop in noise levels, enabling an uninterrupted computing experience. These steps are simple, yet effective in transforming your setup into a quiet haven.
| Setting | Adjustment | Expected Outcome |
|---|---|---|
| Fan Curves | Set up a quiet profile | Lower fan noise during normal operation |
| Power Settings | Select Balanced plan | Reduce power consumption and noise |
| Background Apps | Disable unnecessary tasks | Reduce CPU load and fan activity |
Review these optimizations periodically, as updates and new software can impact performance and noise levels. Tailor the settings as needed to maintain a serene working environment.
For those looking to minimize expenses while acquiring software, the process of acquiring discounted or complimentary product keys can be quite straightforward when approached correctly. Here’s a detailed roadmap to help you locate and utilize keyverified keys without falling into the trap of illegitimate options.
1. Explore Educational and Non-Profit Offers
Many educational institutions and non-profit organizations partner with software companies. Students and educators often have access to free or highly discounted software licenses. Check with your institution’s IT department or software licensing office to uncover these valuable resources.
2. Join Software Discounts Communities
Online forums and community websites like Reddit often feature threads dedicated to sharing discounted software or promotional offers. Engage with these communities; you might stumble upon limited-time offers on trusted software platforms.
3. Use Official Promotions
Companies periodically run promotions offering free product keys, particularly during events like back-to-school seasons or technology expos. Keep an eye on official websites and newsletters of software vendors for announcements of such initiatives.
4. Authorized Retailers
Look for reliable authorized retailers that might offer sales or bundles that include software keys. Websites dedicated to tech deals can alert you to price drops and discount codes that may not be widely advertised.
5. Trial Versions and Upgrade Discounts
Many software products offer trial versions allowing users to test before purchasing. Utilize these trials to determine whether to invest in a full license, potentially taking advantage of introductory prices for upgrades.
| Source Type | Description | Examples |
|---|---|---|
| Educational | Free or discounted licenses for students and educators | Microsoft, Autodesk |
| Promotional Offers | Limited-time free product keys | Holiday promotions |
| Communities | Online forums sharing software discounts | Reddit threads |
Legal Considerations
Be vigilant; using unauthorized keys can lead to software deactivation. Stick to legitimate channels to ensure you are compliant with licensing agreements and protect yourself from potential issues.
Following these steps can lead to successfully securing the keys you need while keeping costs low. Enjoy your tech experience without overspending!

1. Check Your Internet Connection: A stable internet connection is vital for product validation. Ensure you can access websites and services reliably. Try rebooting your router if connectivity issues arise.
2. Verify Your Activation Key: Mistakes happen. Double-check the digits and letters in your activation key. Remember that letters like “O” and numbers like “0” can easily be confused. An incorrect key will prevent successful validation.
3. Restart Your PC: Sounds simple, but a reboot can often resolve transient issues related to software. Restart your system to refresh the processes and attempt the activation again.
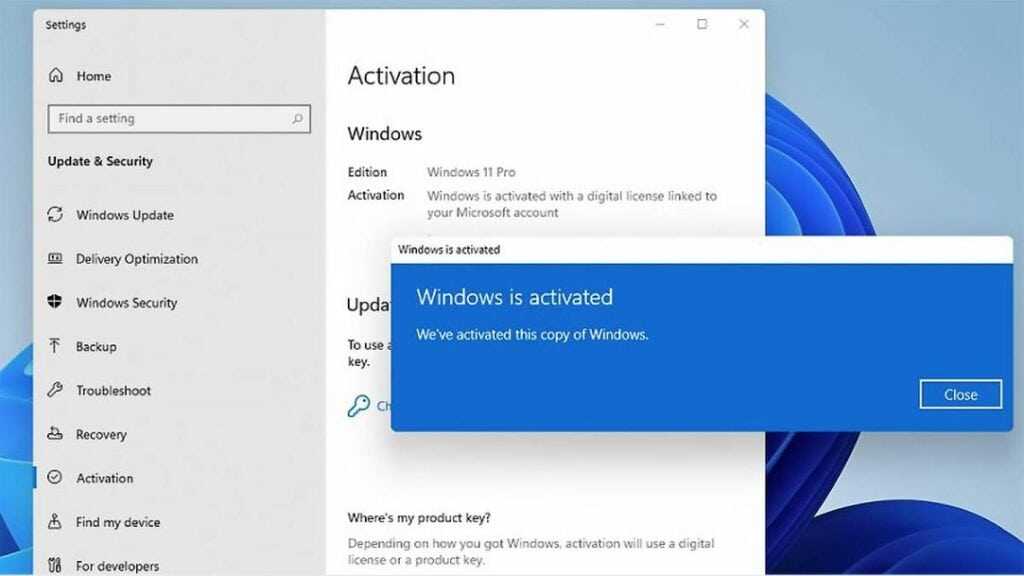
4. Use Built-in Troubleshooter: Navigate to Settings > Update & Security > Activation. Here, you can find the troubleshooter that may automatically detect and fix common activation problems.
5. Update Your System: Missing updates can lead to functionality issues. Ensure your system is running the latest version of the operating system. Go to Settings > Update & Security > Windows Update and check for updates.
| Issue | Possible Solution |
|---|---|
| Invalid Key Error | Double-check the entered key. |
| Activation Server Unavailable | Ensure strong internet connection or try later. |
| Activation Timeout | Restart PC and retry activation. |
If problems persist after attempting these steps, consider consulting an expert or reviewing resources from Microsoft’s official support page for tailored assistance. This proactive approach will ensure your setup remains smooth and efficient.
For further guidance tailored to your needs, check the official Microsoft support page: Microsoft Support


