Physical Address
Timertau, Pr. Respubliki 19, kv 10
Physical Address
Timertau, Pr. Respubliki 19, kv 10

Setting up your computer for academic tasks is crucial, and ensuring your productivity software runs seamlessly can significantly enhance your experience. This basic guide will cover the straightforward steps needed to effectively configure your system and incorporate essential functions. With a properly set up computer, you can focus on your studies without interruptions.
One of the most common challenges encountered during the initial setup phase involves software licensing. It’s vital to understand how OEM keys function, as these often provide a cost-effective solution for licensing various applications. By utilizing OEM keys, you can sidestep the complexities associated with other types of licensing, ensuring a smooth transition to full software accessibility.
Incorporating these tips and understanding your software options will enable you to maximize the efficiency of your device. A well-prepared system serves not only as a tool for learning but also as a foundation for future endeavors, helping you excel in your educational pursuits.
First, assess your computer’s operating system. Compatibility is vital; ensure that the intended program runs on your version of the OS. For instance, Windows 7, 8, or later versions are typically preferred. A quick check can save time and frustration during installation.
Next, evaluate the processor specifications. A dual-core processor is generally the minimum requirement, but opting for a more advanced multi-core chip will enhance performance and efficiency during usage. Additionally, confirm that your device has adequate RAM. At least 4 GB of RAM is often recommended, with 8 GB being optimal for smoother operation while multitasking.
Storage capacity is another critical factor. Ensure that sufficient space is available on your hard drive to accommodate the installation files and allow for future updates. Aim for at least 3 GB of free storage space, but more is preferable for additional use.
Graphics capabilities can influence visual performance, especially when utilizing advanced features. A modern graphics card that supports DirectX is suggested for improved rendering. Verify that drivers are up to date for optimal performance.
Lastly, consider network connectivity. A stable internet connection is often necessary for downloading components and updates, making it vital to have a reliable access point during this process.
By adhering to these recommendations, you can ensure that your setup will be prepared for a smooth transition to the new software environment, facilitating efficient work and productivity.
| Component | Recommendation |
|---|---|
| Operating System | Windows 7 or later |
| Processor | Dual-core or higher |
| RAM | 4 GB minimum, 8 GB recommended |
| Storage Space | At least 3 GB free |
| Graphics | DirectX compatible graphics card |
| Internet Access | Stable broadband connection |
First, if you purchased the software physically, the product code is typically located on a sticker inside the packaging or on the card provided. Ensure you examine all components of the box thoroughly.
For digital acquisitions, check your email confirmation; the code is usually sent in a message upon purchase. If the software was obtained through an educational institution, contact the IT department as they often manage software distribution and can assist you in retrieving the necessary information.
For users who registered the software online, visit the corresponding website associated with your purchase. Log into your account, and you should find your activation code listed under your purchase history.
If you are unable to locate the code using the methods above, consider using third-party software that can extract the product key from an existing installation. Be mindful to select reputable tools to avoid security risks.
For detailed information on secure software use and product key recovery, refer to official sources such as Microsoft’s official site.

To proceed with the smooth setup of productivity software on a device meant for educational use, follow this straightforward method. This ensures that the program runs seamlessly while maintaining a low-impact user experience.
1. Begin by acquiring a valid license key from a reliable source. It’s crucial to check for OEM keys, as they are often more cost-effective for institutional setups. For example, how to get a discount on Windows key can prove valuable.
2. Next, initiate the installation of the application you wish to configure. During the installation process, opt for a custom setup to minimize unnecessary features that could slow down the device.
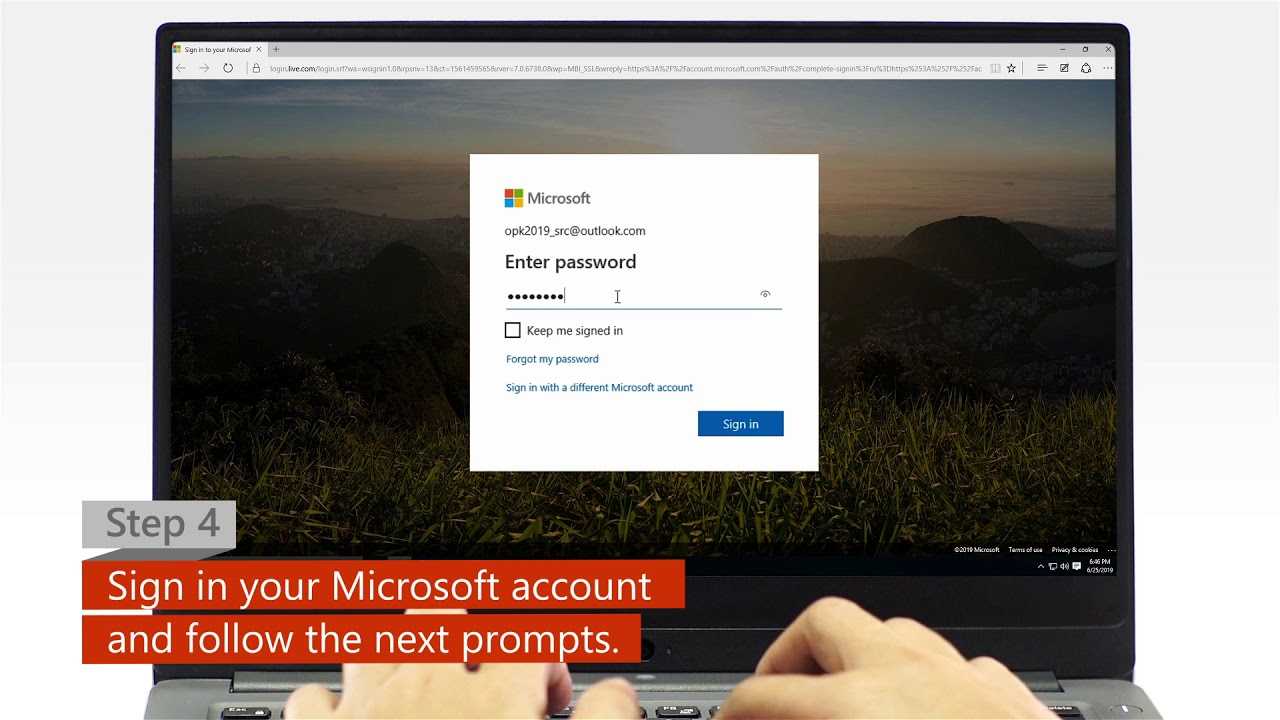
3. Once the installation is complete, open the program. You will typically find an option for entering the license key. Input the key acquired earlier, ensuring there are no typos or errors.
4. After entering the key, follow the prompts that appear on the screen. This may involve online verification, which requires a stable internet connection. Ensure to keep the connection active until the verification process concludes.
5. Upon successful validation, explore the settings menu. Look for options that allow you to streamline functions. Adjust preferences to suit a low-key operation, such as disabling automatic updates or notifications if they’re not necessary for daily use.
6. It’s advisable to keep the software updated periodically, but consider doing so during a designated time. This keeps the system efficient without disrupting educational activities.
This step-by-step guide aims to facilitate a straightforward installation and setup, ensuring that the device remains user-friendly and effective for its intended purpose.
It is advisable to consult the official troubleshooting guidelines on the Microsoft support site, which provides in-depth assistance and up-to-date information. For more information, visit Microsoft Support.
1. Open the program on your device by navigating through the application menu.
2. Once the application launches, locate the “File” tab in the upper left corner. Click on it to bring up a dropdown menu.
3. In the dropdown, find and select “Account” or “Help,” depending on the version you are using. This section typically contains information related to licensing and updates.
4. Here, look for the status indicator. It usually states whether the device is licensed, activated, or requires further action. A confirmation message stating “Product Activated” confirms successful licensing.
If you encounter any issues or an error message indicating the software is not activated, consider rechecking the input of the key used during setup or consult troubleshooting resources.
Utilizing the provided tools and options within the application can enhance your user experience, ensuring that all functionalities are intact. Following this basic guide will help you maintain efficient software operation on your educational device.
For additional support and resources, you may visit the official Microsoft support page at support.microsoft.com.


