Physical Address
Timertau, Pr. Respubliki 19, kv 10
Physical Address
Timertau, Pr. Respubliki 19, kv 10

The process of enabling your suite of productivity software can often seem daunting, but with the right approach, it can be a seamless experience. This article offers a basic guide to deploying the latest version of your Microsoft software efficiently. Understanding the key components involved will empower you to manage your installation with ease.
To kick things off, the silent activation method presents a streamlined avenue for application setup, particularly for environments where multiple instances need to be initiated simultaneously. By leveraging OEM keys and specific command-line options, users can ensure that their software is activated without the need for cumbersome user interaction. This method is particularly beneficial in large-scale deployments, saving both time and efforts.
Moreover, obtaining genuine OEM keys from trusted sources guarantees not only compliance with licensing agreements but also the integrity of your installation. It’s essential to select reliable marketplaces to avoid potential issues, as well as to streamline subsequent software maintenance. With these insights, you’re well on your way to mastering the activation of your productivity suite.
First, verify that your operating system is compatible with the targeted version of the application. Most commonly, systems utilizing Windows 10 or later versions will provide a solid foundation for operations. It’s advisable to keep your system updated, as this not only improves performance but also fixes potential bugs that could interfere with the subsequent setup.
Next, ensure that you have administrative privileges. This enables proper installation and implementation of required tasks without hindrances. If you’re working in a networked environment, confirm that antivirus or firewall settings do not obstruct installation scripts or processes that may be necessary for effective execution.
A clean environment aids in preventing potential errors. Prior to starting, remove any previous installations of the target software. Thoroughly check for remnants in the registry or system files that could conflict with the new version. Utility tools aimed at cleaning can be particularly effective in this regard.
Next, secure your oemkeys in a safe location. These keys will be integral during the implementation process. It’s wise to cross-check key authenticity before initiating the process to avoid unnecessary interruptions due to invalid or expired licenses.
Lastly, familiarizing yourself with command-line tools may facilitate a smoother setup. Many silent implementations benefit from batch files or scripts that automate steps in the activation process. Understanding these tools will allow you to modify scripts as necessary to align with your specific system configuration.
To start, download the installation files from the official source. Use the following command to initiate the download:
curl -O
Once the files are successfully obtained, execute the following commands to start the installation process:
cdsetup.exe /configure configuration.xml
In this essential configuration file, you’ll need to specify settings such as the edition, language, and installation path. Make sure to customize it according to your requirements to ensure a smooth deployment. The configuration file can include parameters that ensure a streamlined setup without any user interaction, enabling silent installation processes.
Post installation, use the command line for quick activation. The command might look like this:
cscript ospp.vbs /act
Make sure to point to the license key with the following:
cscript ospp.vbs /inpkey:
Using this command line method ensures not only that your software is installed but also that it adheres to your organization’s deployment policies without any unnecessary prompts. Following this basic guide, you can efficiently manage the installation and ensure legal compliance through validated keys.
By using script files and command-line inputs, IT departments can handle installations across numerous desktops with ease, enhancing productivity and reducing the need for manual setups.
For those setting up their systems, utilizing KMS can provide a seamless experience. Here’s how to go about it:
For desktop setups, particularly in larger organizations, the process can be automated. Using scripts can eliminate manual activation steps across multiple devices:
When dealing with OEM keys, it’s crucial to remember that they may have different activation requirements compared to retail versions. Always verify which keys are compatible with your KMS setup.
For further information, you can refer to Microsoft’s official documentation regarding KMS activation mechanisms. This resource provides comprehensive details on setup and troubleshooting, ensuring you manage activations effectively.
Firstly, ensure that your desktop setup meets the necessary specifications. This includes checking system requirements such as CPU, RAM, and available storage. Failure to meet these requirements can result in unsuccessful registration attempts.
Another frequent problem involves network connectivity. A stable internet connection is crucial while trying to complete the process. If your connection fluctuates or drops, it may lead to errors in the verification process. Testing your connection speed and ensuring a reliable network can alleviate such hindrances.
It is also essential to verify the licensing key you are using. Using an invalid or already utilized key will result in a denial of access. To avoid this, purchase keys from reputable sources. Learn how to pick a store for key purchase to ensure a smooth experience.
Moreover, address potential conflicts from security software that might block the activation process. Temporarily disabling firewalls or antivirus tools can sometimes resolve activation issues. After making the necessary changes, don’t forget to re-enable your security measures to maintain protection.
Lastly, keeping your computer and software updated is imperative. Sometimes, previous versions may not support the current activation methods. Regularly check for system and application updates to ensure compatibility.
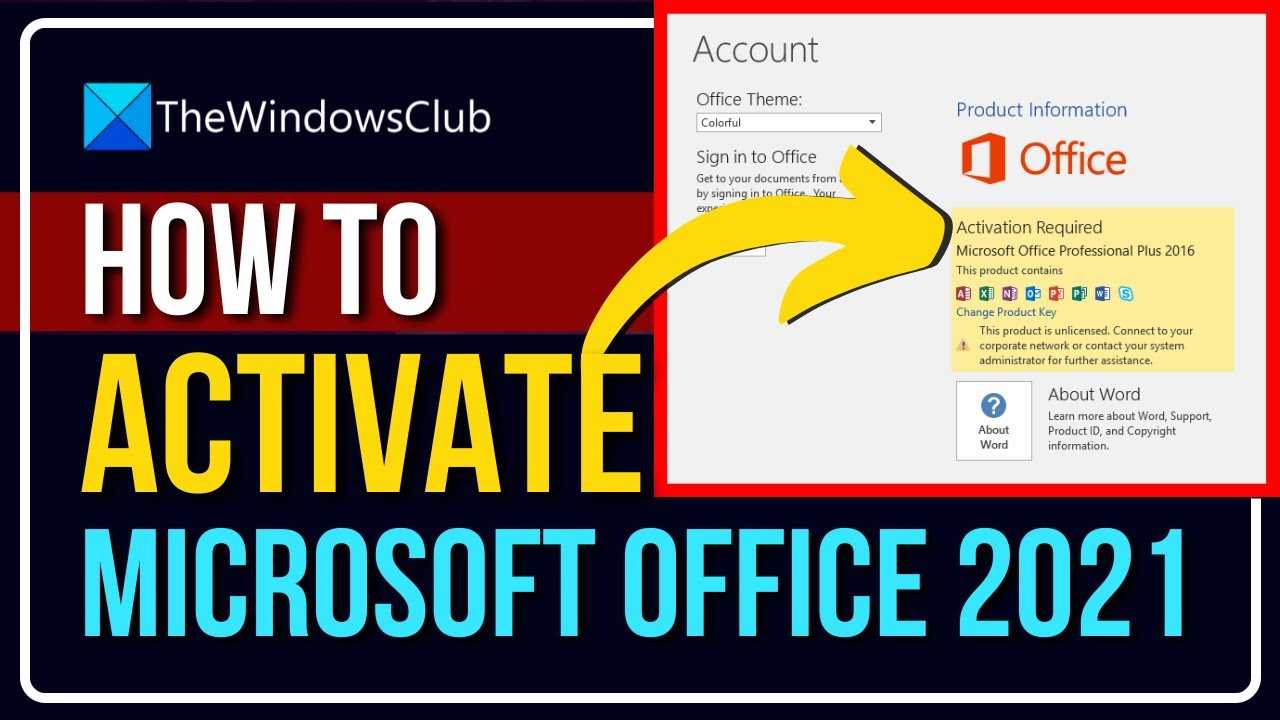
First, open the application you wish to verify. Usually, the activation status can be found within the account options or settings menu. Look for sections labeled “Account” or “Product Information.” This should detail whether your key is recognized and if the installation is activated.
If the software indicates that it requires activation, you will need to enter your genuine product key. Some users may opt for OEM keys, which can sometimes lead to complications if not sourced from reliable channels. Always make sure to buy from reputable vendors to avoid future issues.
Additionally, if you face activation problems, a troubleshooting option is typically available in the help section. This feature can guide you through common errors and help you resolve issues effectively.
For those interested in a more technical approach, utilizing command-line tools like “slmgr.vbs” can also provide detailed insights into activation status. Execute “slmgr /xpr” in the command prompt to check if the software is activated permanently, or “slmgr /ato” to attempt activation online.
Remember, maintaining updated software can enhance performance and security, so check for updates periodically to ensure your setup runs smoothly.
For detailed insights on software activation and management, you can refer to the Microsoft support website, a trusted source in the USA for such information.


